
How to make perfect braai coals, every time
The right wood, a fire with room to breathe, a bit of patience and your own hand: that’s all it takes to braai over proper coals.
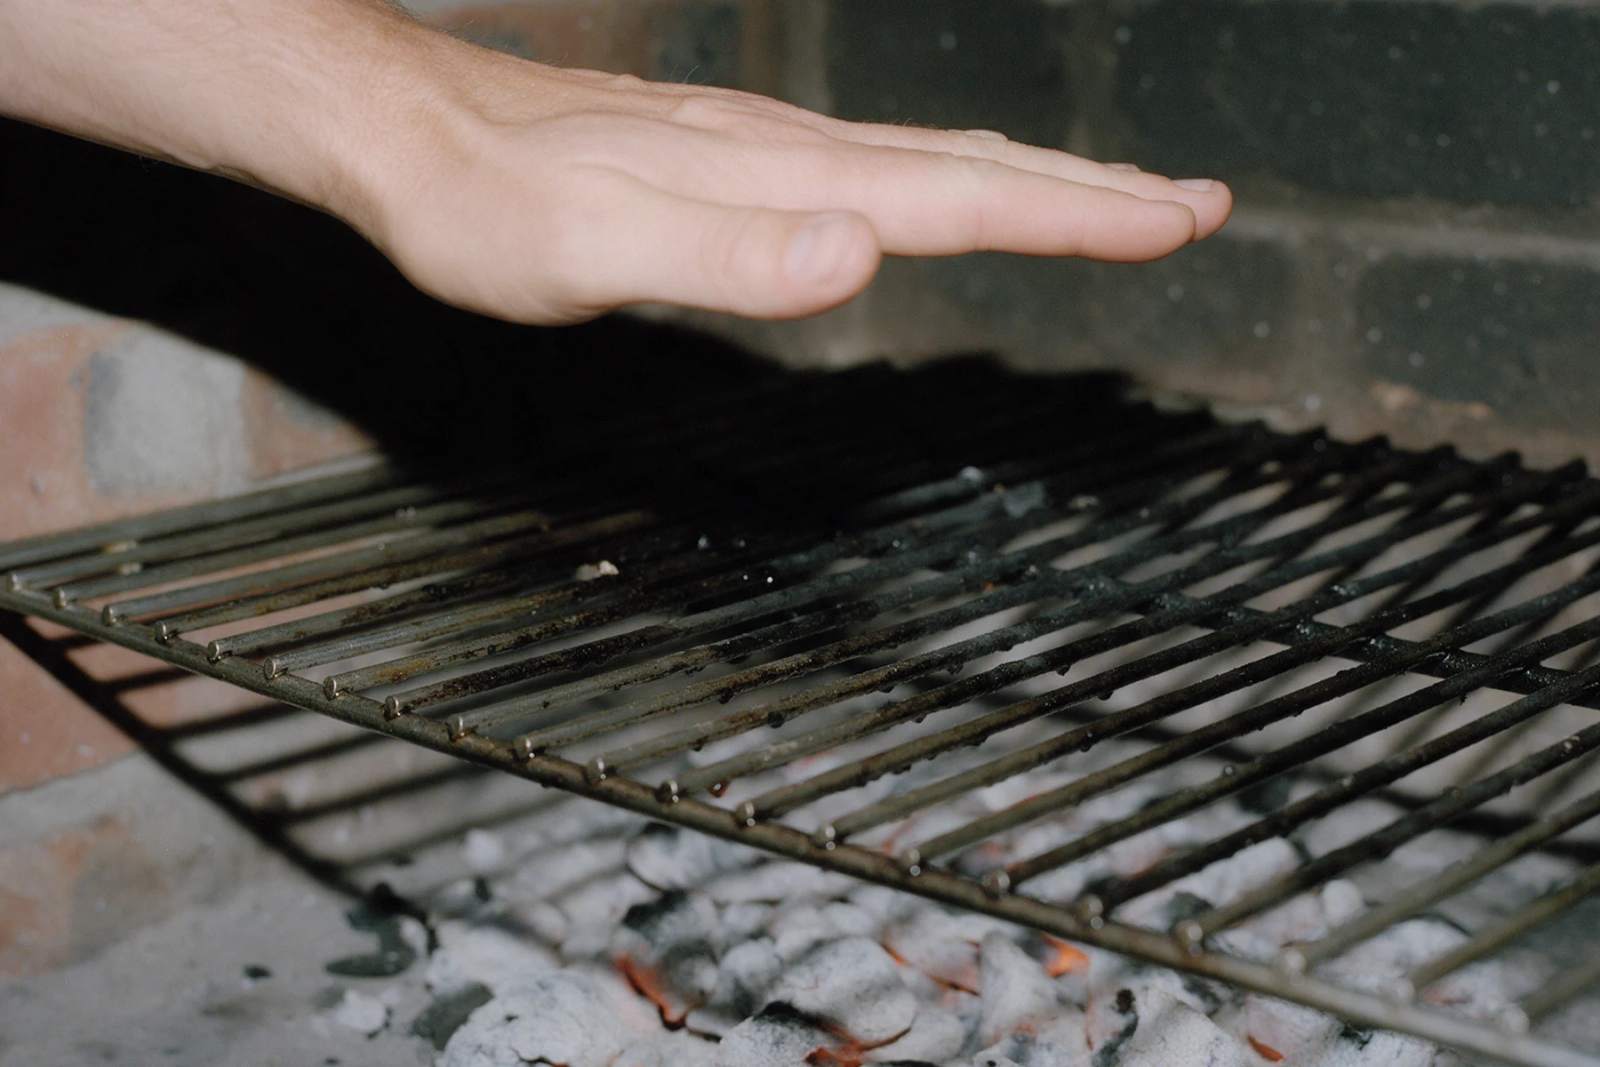
Perfect braai coals come down to three things: wood that actually makes coals, a fire packed loosely enough to breathe, and the patience to wait until the flames have died and the coals glow under a coat of grey-white ash. Then you judge the heat with your hand, not your eyes. Here’s the whole routine, from packing the fire to keeping coals going through a long afternoon braai.
It starts with the wood
Not all firewood is braai wood. If the wood doesn’t want to make coals, no amount of technique will fix it.
Kameeldoring: coals that last
Kameeldoring is the ultimate braai wood. It’s extremely dense, so it burns exceptionally hot, lasts very long and leaves world-class coals that hold their heat through thick chops, a second round of wors and a slow potjie. Ours is always bone dry and ready to burn. The one catch: dense wood is slow to catch, so it needs a proper start and a bit of patience.
Black Wattle: decent coals, economical
Black Wattle is our economical braai wood. It makes decent coals and performs very similarly to Rooikrans, the Cape’s classic braai wood. (We don’t sell Rooikrans; Black Wattle is our Rooikrans-style option.) It’s harvested from sustainable plantations.
Why Blue Gum isn’t a coal wood
Blue Gum burns hot and clean with minimal ash, which is exactly why it’s our pick for the fireplace and closed-combustion stove. But that clean burn means lots of flame and very few coals, and it’s the coals that cook the meat. Save the Blue Gum for the fireplace and braai on Black Wattle or Kameeldoring. Not sure which one suits your braai? Our braai wood page puts them side by side.
How to pack wood for a braai: teepee or log cabin
Fire needs air. Pack the wood tight and it smoulders; leave gaps and it breathes, catches and burns down evenly. There are two classic ways to pack a braai fire.
The teepee
Put firelighters and a good handful of dry kindling in the middle of the braai. Lean thin split pieces against the kindling so they meet at the top like a little tent, then stand the bigger pieces around the outside. The flames climb up through the middle and catch everything at once. A teepee works well for getting dense wood like Kameeldoring going.
The log cabin
Lay pieces parallel on either side of the firelighters and kindling, lay the next layer across them, and keep building up in criss-cross layers like a little hut. The log cabin burns down into a flat, even bed of coals, which makes them easier to spread later.
Which one? Use both. Build a small teepee of kindling and thin pieces inside a log cabin of bigger pieces, and you get the teepee’s quick start and the cabin’s even coals.
Lighting it: no petrol, no paraffin
Light the firelighters on a few sides so the whole core catches together. Then leave it alone. Every poke knocks the structure flat and cuts off the air.
Never use petrol, paraffin or lighter fluid. It’s dangerous, it can flare up without warning, and Taste’s guide to lighting a braai warns that lighter fluid can leave a petrol-like taste on your food. Firelighters and dry kindling do the job.
If the wood is slow to take, the fire needs more heat at its core, not more wood on top. Add kindling and thin pieces, and open up the gaps.
Houtboer tip: Use both woods. Get the fire going with Black Wattle and plenty of kindling, then add Kameeldoring once it’s burning strongly. Dense wood catches far more easily on a fire that’s already hot, and the Kameeldoring gives you the long-lasting coals you’ll actually cook over.
When are the braai coals ready?
The coals are ready when:
- the flames have died down, with only the odd small flicker left;
- the wood has broken up into chunks that glow orange-red inside;
- most of the surface is covered in a light grey or white ash.
That’s the same sign IOL’s braai basics guide gives, and it flags a common beginner mistake: putting the meat on before the coals are ready. A big fire looks impressive, but flames aren’t cooking heat. They char the outside of the meat, coat it in soot and leave the middle raw.
How long it takes depends on the wood, the wind and how well you packed the fire. Dense Kameeldoring is slow to catch, so give it extra time. Once its coals are there, though, they last.
The rule of thumb: light the fire earlier than you think you need to. Nobody ever complained about coals that had to wait for the meat.
Braaiing this weekend? WhatsApp us about braai wood and we’ll help you choose. We deliver in Paarl, Wellington, Val de Vie and Pearl Valley, and in Klapmuts and Franschhoek for an additional fee.
The hand test
Your eyes tell you when the coals are ready; your hand tells you how hot they are. Hold your palm flat just above the grid, where the meat will cook, and count the seconds until you have to pull away. Pull away the moment it gets uncomfortable: it’s not a competition.
- About 2 to 4 seconds: high heat. Steak, for a quick sear.
- About 5 to 7 seconds: medium heat. Chops, wors and sosaties.
- About 10 seconds: gentle, steady heat. Chicken and anything on the bone.
Every braaier (and every hand) counts a little differently, and the guides don’t all agree, so treat these numbers as a starting point. The first two bands follow Weber’s hand test, which calls 2 to 4 seconds high heat and 5 to 7 seconds medium. If you want one all-round number, Taste says you should manage about 7 to 10 seconds before any meat goes on. Chicken needs the most patience: IOL’s guide to braaiing chicken says not to put it down until you can hold your hand at cooking height for at least 10 seconds, or the outside burns before the meat at the bone is cooked. Steak is the one that wants the hottest coals you’ve got.
Spread the coals: a hot side and a cool side
Once the coals are ready, spread them with a braai spade or a long poker. Don’t flatten them into one even layer. Pile them thicker on one side and thinner on the other:
- Hot side: steak, and the first sear on chops.
- Cool side: chicken, thick wors and anything that needs time. It’s also your safe spot when fat drips and the flames jump up.
Put the grid on for a few minutes before the meat so it heats through. Hot bars sear the meat and help stop it sticking. Then do the hand test on both sides so you know exactly what you’re working with.
Keeping braai coals going: the feeder fire
For a long braai, a big crowd or a potjie, the first lot of coals won’t last the afternoon. The answer is a feeder fire. Keep a small fire burning on one side of the braai, or in a fire basket next to it, and add your wood there, never under the meat. As the coals under the grid start to fade, rake fresh coals across from the feeder fire.
Kameeldoring is made for this. Each piece keeps making coals for a long time, so you only need to top up now and then.
Houtboer tip: Start the feeder fire before you need it. Put fresh wood on the feeder fire as soon as you spread the first coals, not when the grid starts going cold. By the time you need the next lot, it will be ready.
Common mistakes
- Braaiing over flames. Flames mean soot and burnt outsides. Wait for the ash.
- Poking all the time. Leave the fire alone while it builds. Every poke knocks it flat and smothers it.
- Starting too late. Hungry guests plus a fire that’s still roaring is how meat goes on too early. Light up sooner.
- Fresh wood under the grid. It flares and smokes straight into the food. Feed the feeder fire instead.
- Packing too tight. Wood needs air to catch. Leave gaps.
- Petrol or paraffin. No. Never.
Braai Day and big-crowd braais
24 September is Heritage Day, and thanks to Jan Braai’s National Braai Day campaign it’s also the country’s big braai day. Big braais need more coals for longer, so whether it’s Braai Day, a birthday or the December holidays, light up early, build the feeder fire from the start and lean on Kameeldoring for staying power.
We deliver braai wood in Paarl, Wellington, Val de Vie and Pearl Valley, Western Cape, and in Klapmuts and Franschhoek for an additional fee. To go deeper on the woods, read our Kameeldoring braai wood guide and our honest look at Rooikrans vs Black Wattle.
Questions we get about this
How long until braai coals are ready?
It depends on the wood, the wind and how well you packed the fire. As a rough guide, Black Wattle gets to coals in about 45 minutes to an hour. Kameeldoring is dense and slow to catch, so allow about an hour, sometimes more, but its coals last much longer. Go by the look of the coals and the hand test, not the clock.
How do I do the hand test?
Hold your palm flat just above the grid, where the meat will cook, and count the seconds until you have to pull away. About 2 to 4 seconds is high heat for searing a steak, about 5 to 7 seconds is medium heat for chops and wors, and about 10 seconds is gentle heat for chicken and anything on the bone. Pull your hand away as soon as it gets uncomfortable.
Can I add wood during the braai?
Yes, but never under the meat. Fresh wood flares up and smokes straight into the food. Keep a feeder fire going on one side of the braai, add your wood there, and rake fresh coals across under the grid as the first lot fades.
Which wood makes the best coals?
Kameeldoring: it burns exceptionally hot, lasts very long and leaves world-class braai coals. For an economical everyday braai, Black Wattle makes decent coals and performs very much like Rooikrans. Blue Gum gives lots of flame and few coals, so keep it for the fireplace.
Why is my braai fire slow to catch?
It usually needs more heat at its core, not more wood on top. Add dry kindling and thin pieces, open up the gaps so air can get in, and light up a bit earlier. Dense wood like Kameeldoring is slow to catch, so add it once the fire is already burning strongly.